
INTRODUCTION
I was on a quest to build my dream DIY coffee table! Here is the step-by-step process along with all design details for anyone who would like to make this DIY round coffee table.

MATERIAL LIST
- Grade-A Plywood Board, 0.75in. Thick, 30″X 30″ minimum (Quantity: 1)
- 2-in. X 2-in. Lumber, 3 ft. Length Sections (Quantity: 4)
- 2-1/2″, #8, Pocket Hole Wood Screws, (Quantity: 24)
- 1″, #8, Pocket Hole Wood Screws, (Quantity: 4)
- 0.75″ Edge Banding, pre-glued and stainable
- Oil-Based Wood Stain (I used Minwax in Rustic Beige, Semi-Transparent)
- Lacquer (I used Minwax in Clear Satin)
TOOLS USED
- Safety Glasses
- Respirator (for use when applying stain and lacquer)
- Disposable Gloves (for use when applying stain and lacquer)
- Ruler/Tape Measurer
- Pencil or Marker
- Jig Saw
- Miter Saw (I use a DeWalt 12″ Double Bevel Compound Miter Saw)
- Kreg Pocket Hole Jig 310 Set
- Orbital Sander
- 160, 180, 220 Grit Sanding Disks
- Soft Jaw Clamps
- Power Drill
- 1/2″ Woodboring Spade Drill
- Clothing Iron (for edge banding application)
- Box Cutter/Utility Knife (to trim edges after edge banding application)
- Sanding Sponge (to smooth edges after edge banding application)
- Foam Paint Brush (for stain application)
- Shop Towels or Sacrificial Rags (to wipe off excess stain)
- Bristle Paint Brush (for lacquer application)
- Mineral Spirits in Glass Jar (to clean brush between lacquer coats)
DESIGN
I went with a minimalistic design because this style seems to create a cozy atmosphere in my opinion. Another more practical reason is that I am new to furniture-making and “simple” seemed most achievable! We have a U-shaped sectional sofa. So, something small was needed. A table top diameter of 29″ suited our space the most. However, if someone decided to recreate this with a larger top, I would recommend also widening the base to maintain stability.
What initially inspired this project was the fact that we had a nice piece of scrap grade-A plywood available in storage. It happened to be just the right size for the top of this table. I cut the table base from four three-foot sections of 2-in. X 2-in. poplar lumber. This just happened to be what was available at a nearby Lowes.


BUILD PROCESS
STEP 1: CUT OUT THE TABLE TOP
I drew a 29″ diameter circle in this 0.75″ thick plywood board using a protractor. Then, I slowly cut out the shape using a jig saw. This worked surprisingly well. In the future, however, I might explore using a legitimate circle-cutting jig for a jig saw instead of free-handing this. There were a few areas where I messed-up the cut slightly and sanding could not quite make up for it. These spots caused some issues when it came to the edge-banding application later on.


STEP 2: CUT 14″ LEG SECTIONS WITH 10∘ AT ENDS
For the coffee table legs, I began by cutting four 14″ long pieces from the 2″ X 2″ lumber with a miter saw. Next, I adjusted the miter setting on the base of the saw to a 10∘ angle. On both ends of each 14″ leg section, I cut at this angle in alternating directions. Of course, try to maintain the same 14″ overall length with all four leg pieces, but if one leg is accidently cut a little too short, re-cut the others to match.


STEP 3: CUT LOWER CROSS COMPONENTS WITH 10∘ AT ENDS
To create the Lower Cross, I used the miter saw to cut more of the 2″ X 2″ material into one 17.5″ piece and two 8″ pieces. Next, I cut all four ends of the lower cross to a 10 degree angle. Similar to leg pieces, be careful not to affect the overall length of each section.


STEP 4: CUT UPPER CROSS COMPONENTS
I next formed the upper cross by cutting the remaining 2″X 2″ material into one 19.5″ section and two 9″ sections.

STEP 5: DRILL POCKET HOLES INTO LEG COMPONENTS
I ended up using the Kreg Pocket Hole Jig 310 set to create all of the pocket holes on this project. I made some initial attempts at free-handing this before getting this jig. Ultimately, I’m not that confident in my wood-working skills yet, so I wanted this jig to create a cleaner result. I adjusted the jig to the 1.5″ setting and secured it with a clamp to my work surface. I used a power drill to create two pocket holes on the upper, inner face of each leg piece.


STEP 6: DRILL POCKET HOLES INTO LOWER CROSS PIECES
The “Lower Cross” portion of the base is riddled with pocket holes, but all will remain discretely hidden on its lower face. For fastening the cross itself together, I drilled two pocket holes in the direction of the center of the cross on each 8″ long section. To later secure the lower cross to the table legs, two more pocket holes were drilled on each end.

STEP 7: DRILL POCKET HOLES INTO UPPER CROSS PIECES
The Upper Cross components only needed four pocket holes. Similar to the Lower Cross, I drilled two hole on each 9″ section towards the center of the cross.

STEP 9: SAND, SAND, SAND!
The surface finish on the lumber I used was already close to smooth. So, I began with a 120 grit sanding disk. Then, I repeated the process with 180 and 220 grit. Using an orbital sander, I sanded the table top and all base components till it all felt buttery smooth. I did not sand the angled end faces of the base components.


STEP 9: ASSEMBLE UPPER AND LOWER CROSS BASE COMPONENTS
To begin the base assembly, I marked the center locations of each cross component and fastened these together using 2-1/2″ pocket hole wood screws.


STEP 10: ASSEMBLE COFFEE TABLE BASE
Using sixteen more 2-1/2″ pocket hole wood screws, I attached the legs to the Lower Cross and Upper Cross. The Lower Cross is meant to be positioned 2 inches vertically up the legs. It was helpful to use a clamp with soft jaws to help align everything during this process.


STEP 11: ATTACH TABLE TOP TO BASE
To finish up the assembly phase of this DIY coffee table., I placed the best-looking side of the coffee table top face-down on my work surface. Then, I centered the Upper Cross portion of the previous-assembled base on the table top. When centered, the ends of the Upper Cross should be about 4.75″ from the edge of the table top. I fastened the base to the table top using four 1″ long wood screws at each end of the Upper Cross. I used a 1/2″ spade drill to create 0.125″ deep counterbores for each screw location.


STEP 12: APPLY EDGE BANDING
I chose a 0.75″ pre-glued, stainable edge banding to cover up the table top’s plywood edges. I used a clothing iron at a moderately-high heat setting to activate the glue while pressing the banding against the table edge. This was my first project involving edge-banding. The process took a great deal of patience. Once the banding was fully applied, I used a box cutter to slice off the excess. Then, I smoothed down the edges with a sanding sponge.


STEP 13: APPLY WOOD STAIN TO ALL SURFACES
I decided to stain the entire table with a semi-transparent stain in a light-greyish-brown shade called “Rustic Beige” by Minwax. I stained the table in sections to try to maintain a consistent color intensity throughout. In a well-ventilated area, I applied the stain with a sponge brush. After letting it sit for 5 minutes, I wiped off the excess with shop towels. One coat was dark enough to me. So, I did not apply a second coat.


STEP 14: APPLY LACQUER TO ALL SURFACES
I waited until the morning of the next day to begin the long process of applying the lacquer. I used a lacquer from Minwax with a “Clear Satin” sheen. This particular lacquer instructed me to apply a total of three coats, waiting 2 hours between each coat. No sanding was required between each coat. I applied it with a bristled brush and cleaned the brush between coats with mineral spirits. In addition to being in a well-ventilated area, I used a respirator and gloves when working with this product.


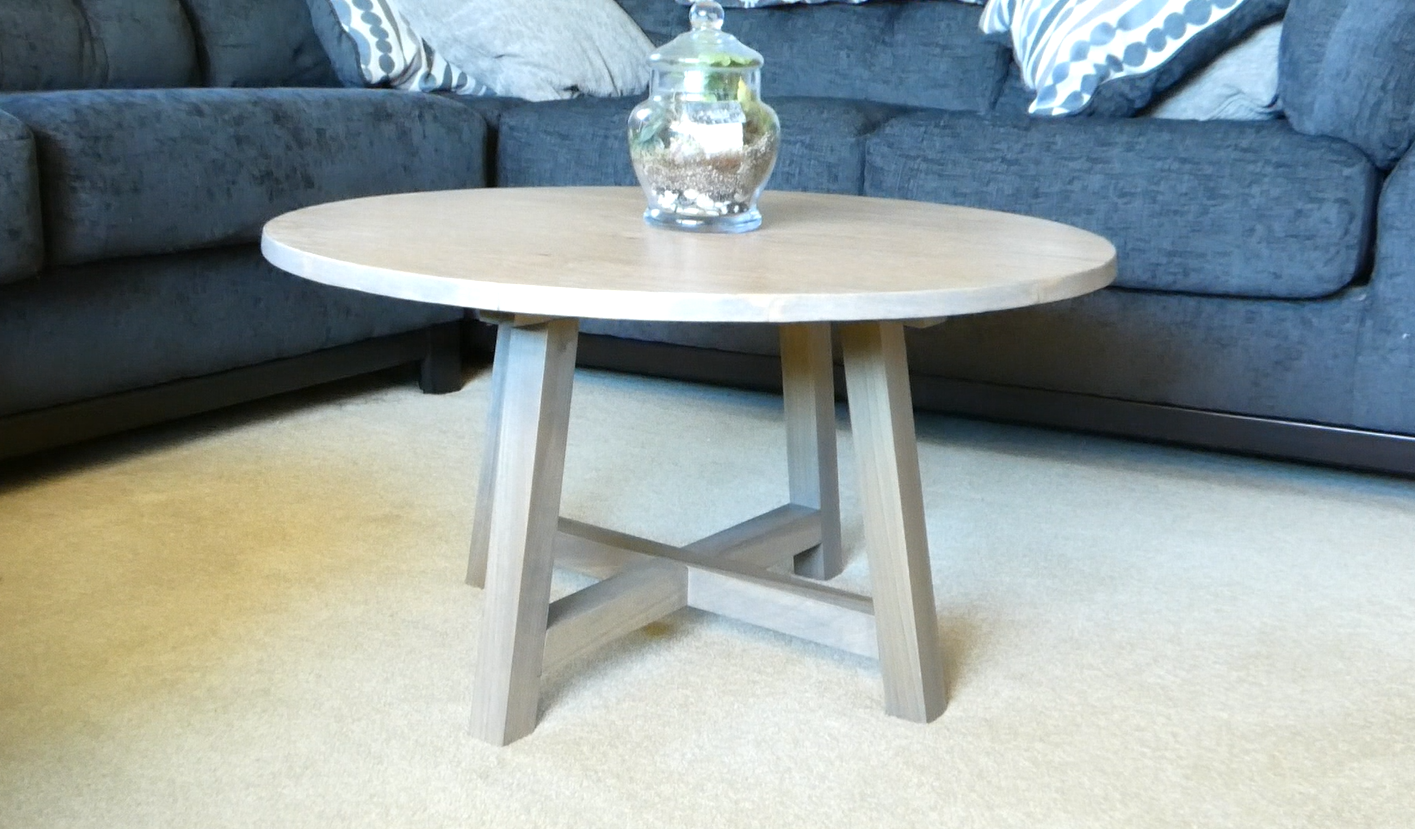
RESULTS
The strong lacquer smell lingered on the coffee table for a while. So, I let the table air out in the garage for a day before finally setting it up in our living room! Here’s the finished coffee table topped with a mini terrarium.

Leave a Reply