
INTRODUCTION
This table came along with the house when we moved here. I appreciated it’s original look but this remodel had practical motivations that I’ll explain later in the post. Ultimately, I was excited to have an excuse to turn this into something that better suited our décor style!

MATERIAL LIST
- 38″ X 100″, 1-1/2″ Thick, Table Top Board
- CitriStrip Stripping Gel
- 4″ X 4″, 8 ft. Long, Lumber (Quantity: 3), I used Douglas Fir
- 5″ X 24-1/4″, 1-1/2″ Thick, Pine Board (Quantity: 2), for Upper Portion of Legs
- 2-1/2″ Long, #8, Pocket Hole Wood Screws, (Quantity: 12)
- 2″ Long, #8, Pocket Hole Wood Screws, (Quantity: 16)
- Oil-Based Wood Conditioner, I used Minwax Pre-Stain
- Minwax Oil-Based “Fruitwood” Semi-Transparent Wood Stain
- Minwax Oil-Based “Simply White” Semi-Transparent Wood Stain
- Oil-Based Lacquer, I used Minwax, Clear Satin
TOOLS USED
- Safety Galsses
- Respirator (for use when applying stain and lacquer)
- Disposable Gloves ((for use when applying stain and lacquer)
- Scrapper (for removing stripping gel)
- Tape Measurer
- Pencil or Marker
- Orbital Sander
- Orbital Sanding Disks (60, 80, 120, 180, 220 grits)
- Miter Saw (I use a DeWalt 12″ Double Bevel Compound Miter Saw)
- Power Drill
- Kreg Easy-Set Pocket-Hole Drill Bit, 3/8th” Diameter
- Kreg 6″, #2 Square Driver Bit
- Pocket Hole Jig, suitable with 3.5″ material thickness, if desired
- Bristle Paint Brushes (for Lacquer application)
- Soft-Jaw Clamps
- Wooden Stir Sticks (for stirring stains and lacquer before application)
- Rags (for applying wood conditioner and stain)
- Mineral Spirits (for removing excess stripping gel and for cleaning brushes between lacquer coats)
DESIGN
The subject of this project is a well-used 30-40 year old table and the varnish coating was breaking down, making the surface sticky. So, the main goal was to sand everything down and apply new stain and lacquer seal. I decided to use a lighter stain for the re-model, nearly a natural wood look.
The scope of the project expanded to also address issues with the original leg set-up. While I appreciate the look of the current legs, I decided to trade these out for a simple A-frame style. I’ll also be changing the leg spacing to address an ergonomic issue. Without the leaf extensions, the end seats have about 10″ of horizontal leg room. A little annoying, in my opinion. So, we’ve been keeping the leaf extenders in the table as a permanent feature. However, the old leg spacing does not allow a comfortable amount of room for the chairs on the sides. Spacing the legs out will add more elbow room for the side seats and make the table look more balanced with the leaf extensions in place.


STAIN CHOICES
This was my first experience staining Douglas Fir. It took a little while to figure out the right techniques to get my preferred result. My test stain swatches turned out badly with the stain not absorbing through the entire grain. After doing some research, I realized that I over-sanded. So, on the final version I sanded the Douglas Fir only to 120 grit. I also had some issues with blotchiness. So, I ended up applying wood conditioner as well. I heard that gel stain is considered best for Douglas Fir, but oil stain ended up working out well for me with the other technique corrections.
I decided to layer two semi-transparent Minwax stains (“Simply White” and “Fruitwood”) to create a light-tannish brown tone. I used different ratios for the two colors for the table top components and Douglas Fir legs in order to keep a cohesive color tone with the two parts of the table.
BUILD PROCESS
STEP 1: REMOVE OLD SURFACE FINISH FROM TABLE TOP COMPONENTS
I dismantled the table and moved everything to the garage to begin the sanding process. I’ll be re-using the upper portion of the legs for the new A-frame design for this table, but I think I’ll save the rest of the old table legs for a different project later on. The old seal coat was in a thick layer. I started by simply sanding everything down with 60 grit sanding disks, using an orbital sander. After gumming up a few sanding disks, I decided to try out a wood stripper since the there was a lot of surface area to deal with. I used a couple coats of Citristrip stripping gel. This got off the worst of it. After cleaning off the stripping gel with mineral spirits, I continued sanding with 60 grit to remove what was leftover.
At this point, I learned that this table top is made from lumber-core plywood. The top veneer layer of the board must have originally been about 1/8″ thick and had been heavily sanded in the past. There was just a scant layer of the veneer left. So, I decided to sand off the remaining veneer to expose the edge-glued strips beneath. After also removing the old varnish and stain on the extension leaves, I saw that these sections were already lacking the top veneer layer. The old dark, solid-colored stain disguised this well. While this is definitely not the intended use of lumber-core plywood. I love the appearance of the wood strips. It reminds me of solid-patterned butcher block countertops.


STEP 2: SAND TABLE TOP COMPONENTS TO 220 GRIT
I continued to sand the table top components up to a stainable condition using an orbital sander. Everything was sanded down to 60 grit from the previous set. So, I repeated the process with 80 grit and then moved to 120, 180, and 220 grit.


STEP 3: CUT TABLE LEG AND CROSS BEAM COMPONENTS
For the A-frame legs and cross beam, I picked up three 4-in. X 4-in. Douglas Fir beams from a nearby home improvement store. I used a miter saw to cut these into sections for the legs. For the cross beam, I cut a 51-1/2″ long section. For the two legs, I next cut two 21-1/4″ pieces and four 27-3/4″ long pieces. The upper portion of the legs were re-used from the old leg set-up. These were two 1-1/2″ thick, 24-1/4″ X 5″ boards.


STEP 4: CUT 8∘ ANGLE IN TABLE LEG COMPONENTS
Next, I adjusted the miter setting on the base of the miter saw to an 8∘ angle. On the ends of each leg section as shown below, I cut the 8∘ angles, making sure to not reduce the overall length of each piece.


STEP 5: DRILL POCKET HOLES FOR LEG COMPONENTS AND CROSS BEAM
To keep the fasteners hidden from view, I prepared pocket holes to later assemble these leg components. I drilled four pocket holes on the bottom face of each leg cross piece. Two more pocket holes were drilled on either end of the bottom face of the 51-1/2″ cross beam to later connect the two legs.
I own the Kreg 310 Pocket-Hole Jig, but it only works with a maximum wood thickness of 1-1/2″ and drills at a 15∘ angle off the wood surface. I used the Kreg 3/8″ diameter stepped drill (Easy-Set Pocket-Hole Drill Bit) from this Kreg 310 set to drill these pocket holes, but I made some adjustments for this 3.5″ thick material. I started the pocket holes about 2-1/2″ from the end of the beam and drilled at a 35∘ angle, using 3″ of the drill for depth. With this thicker lumber and not-so-steep angle, my free-handed attempts were not too bad, but I ended up 3D printing a little pocket hole jig to keep my hole drilling consistent.


STEP 6: SAND TABLE LEGS TO 120 GRIT
To prepare for staining, I sanded the leg components and cross beam with an orbital sander. Starting at 60 grit and then stepping to 80 and 120 grit.

STEP 7: ASSEMBLE LEGS WITH 2-1/2″ WOOD SCREWS
The cross piece of the legs is meant to be positioned 8″vertically up the legs. I used soft-jaw clamps to keep everything correctly positioned during this process. Using a power drill, I fastened the leg cross pieces using 2-1/2″ long pocket hole wood screws. Next, I centered the upper boards on each leg and attached these using 2″ long wood screws in counterbored holes.


STEP 8: APPLY CONDITIONER AND STAIN TO TABLE TOP COMPONENTS
Before beginning the staining process, I used a rag to wipe off any sawdust from all table top components. Once I was confident that the surface was clean, I applied Minwax oil-based wood conditioner with a rag. I let the conditioner soak in for about five minutes before adding the wood stains. The first layer of stain was Minwax “Simply White”. I quickly wiped a very minimal amount across the entire surface. By the time I finished applying the white stain, I began applying the “Fruitwood” stain, effectively mixing the two on the surface. After waiting a few more minutes, I used a clean rag to wipe off the excess stain in long, even strokes. Not exactly following the directions on the back of can, but this process gave me my desired results.


STEP 9: APPLY CONDITIONER AND STAIN TO LEG COMPONENTS
After wiping any dust from the leg components, I applied wood conditioner in the same way as before. My goal was to lighten up the redness in the Douglas Fir. So, I applied a thick, even coat of the Minwax “Simply White” stain. I let this white stain soak in for for 5-10 minutes. This white stain alone almost gives this wood a disturbing pink undertone. But this gets adjusted after next applying a thin layer of the “Fruitwood” stain. This by no means eliminates the redness in the grain, but it did create a light tan undertone that pairs better with my table top.


STEP 10: APPLY LACQUER TO ALL COMPONENTS
The next day, I brushed on three coats of lacquer to the table top and legs, waiting two hours between each coat. Be sure to apply lacquer in a well ventilated area and wear a respirator, gloves and safety glasses. I cleaned the brush with mineral spirits between each coat.

STEP 11: BRING IT ALL TOGETHER!
Once the lacquer had dried overnight, I assembled the final table. I attached the cross beam to the legs with 2-1/2″ long pocket hole wood screw and attached the new leg set-up to the table top using 2″ long wood screws.


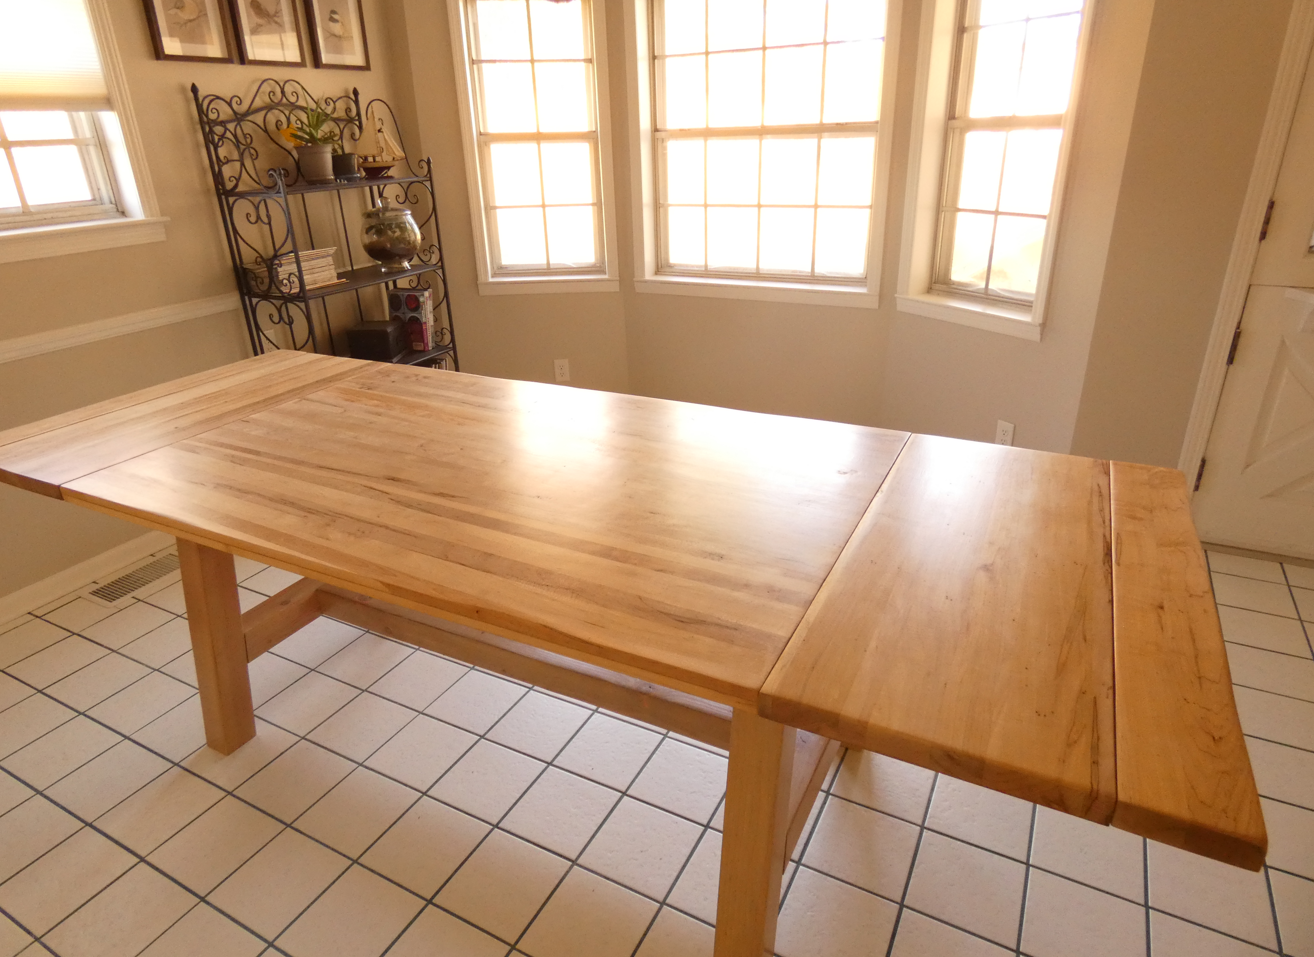
RESULTS
I cannot help but imagine that a professional furniture-maker would be scandalized by this use of ruined lumber core plywood. Personally, I love the varied wood tones. Tell me what you think!

Leave a Reply