
INTRODUCTION
Up until now, we used a generic pressure-mounted baby gate to keep our puppies on the first floor of our house during the day. Recently, I accidently broke the locking latch on that gate and decided that it would be fun to build a custom dream gate as a replacement!

MATERIAL LIST
- 1/4-in. Thick, 47″ X 47″ Plywood Project Board (Quantity: 1)
- 1/2-in. X 3-in., 4-foot Long, Poplar Boards (Quantity: 10)
- Gorilla Wood Glue
- 3/4″ Brads, 19mm
- Wood Filler
- Interior Paint
- 3-1/2″ Hinges (Quantity: 2), with fasteners set
- Self-Latching Gate Latch (Quantity: 1), with fasteners set
TOOLS USED
- Safety Glasses
- Tape Measurer
- Pencil or Marker
- Circular Saw
- Miter Saw (I use a DeWalt 12″ Double Bevel Compound Miter Saw)
- Brad Nailer Gun (I used a Ryobi P320 Airstrike)
- Putty Knife (For applying wood filler)
- Orbital Sander
- 120 Grit Sanding Disk
- Paint Brush
- Power Drill
- 7/64 Drill Bit, or similar size to pre-drill the hinge and latch screw holes
DESIGN
I bought a 47″ X 47″, 1/4-in. thick plywood project panel from Lowes for the main part of this gate. By itself, this thin board is a little floppy. Everything was stiffened up after adding the 1/2-in. thick wood frame and installing the gate with hinges.

BUILD PROCESS
STEP 1: CUT PLYWOOD PANEL TO SIZE
I marked out the dimensions of the gate on the 1/4-in. thick, 47″ X 47″ plywood board. Then, I used a circular saw to cut the plywood to the correct size. In my case, I made a 46″ X 36″ board.

STEP 2: CUT FRAME PIECES TO SIZE
Mostly for decorative reasons, I decided to create a frame around both sides of the plywood board with eight 4 foot long, 1/2-in. X 3-in. Poplar strips. I used a miter saw to cut four 46″ long sections and four 36″ long sections. Next, I used the miter saw again to cut each end at a 45∘ angle to form the frames.


STEP 3: ATTACH FRAME PIECES TO PLYWOOD
I used a combination of wood glue and brads to attach the frame pieces to the plywood. I applied a liberal amount of Gorilla wood glue around the perimeter of the plywood board and pressed the frame pieces on top. Once everything was lined up acceptably, I used a Ryobi Brad Nailer to secure the strips with multiple 3/4″, 19mm brads. I attached this frame on both sides of the gate. Next, with the remaining 1/2-in. X 3-in. Poplar boards, I added a decorative “cross” design to the center of the “front” side of the gate.


STEP 4: APPLY WOOD FILLER
There were definitely a few frame corners where my miter saw cuts were a little off. I filled in those gaps with wood filler using a putty knife. To create a cleaner finish, I also used wood filler on the little holes left by the brads and on the rough outer edges of the plywood.


STEP 5: SAND WOOD FILLER
After the wood filler had dried completely, I quickly smoothed out all of those areas with a 120 grit disk on an orbital sander.

STEP 6: PAINT
Next, time to paint! To make sure that the gate blends in well with the rest of the house, I used a paint color that matched nearby walls. I applied two coats of Valspar “Agreeable Gray” — an light grey color — to both sides of the gate.

STEP 7: INSTALL HINGES AND GATE LATCH
I installed black 3.5″ long hinges and a self-latching latch using the fasteners provided with them. To prevent any issues with splitting, I pre-drilled all the holes before installing the screws. I decided that I liked the look of exposed hinges on the front of this gate. Alternatively, a recess could be cut into the gate’s edge to install the hinge so that only the knuckle is exposed.


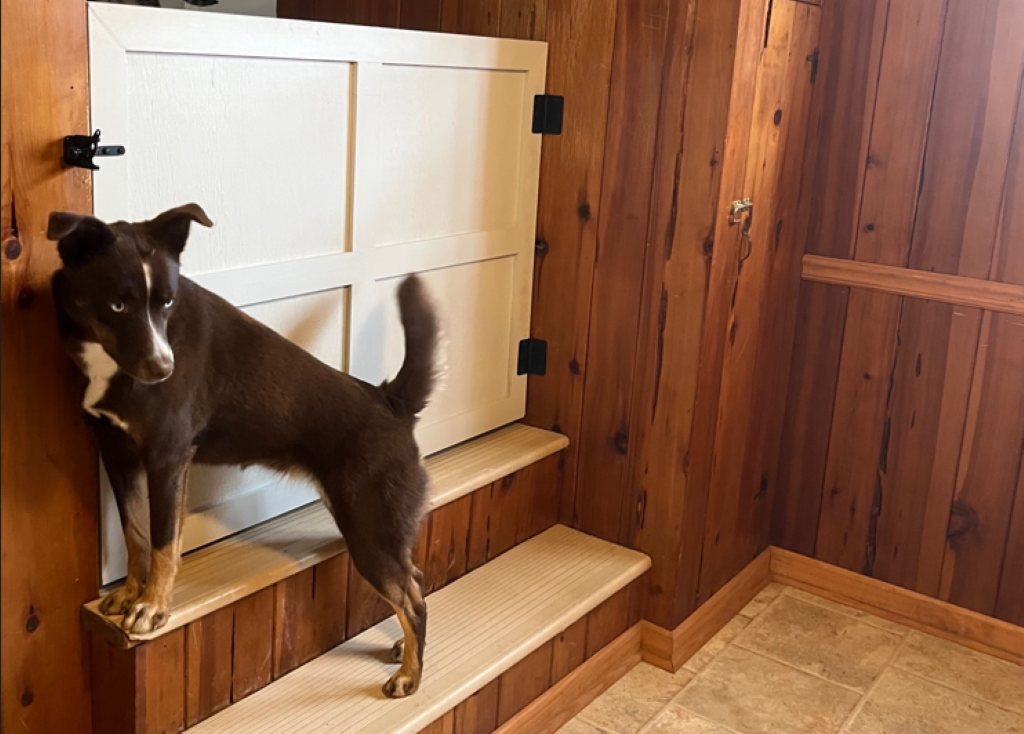
STEP 8: INSTALL GATE AND FINAL RESULT
I installed the gate with about an inch clearance off the ground and attached the latch high up on the gate to make it more convenient to reach when walking down the steps.
Here’s the final result in use!

Leave a Reply